ARA API Server authentication and security
The API server ships with a default configuration that emphasizes simplicity to let users get started quickly.
By default:
A random SECRET_KEY will be generated once if none are supplied
No users are created
API authentication and permissions are not enabled
ALLOWED_HOSTS and CORS_ORIGIN_WHITELIST are configured for use on localhost
These default settings can be configured according to the requirements of your deployments.
Note
For production use and to avoid unintentionally leaking passwords, tokens, secrets or otherwise sensitive information that ara might come across and record, it is strongly encouraged to:
Setting a custom secret key
By default, the API server randomly generates a token for the ARA_SECRET_KEY setting if none have been supplied by the user.
This value is persisted in the server configuration file in order to prevent the key from changing on every instanciation of the server.
The default location for the server configuration file is
~/.ara/server/settings.yaml.
You can provide a custom secret key by supplying the ARA_SECRET_KEY
environment variable or by specifying the SECRET_KEY setting in your server
configuration file.
Authentication and user management
It is recommended to set up authentication to protect the ara API and reporting interface since the data collected by ara can be sensitive or otherwise non-public information about your hosts, playbook files or task results.
There are two main ways of managing authentication:
Via a server/proxy in front of the API server (recommended, best performance)
Via django’s built-in authentication (impacts performance but doesn’t require server/proxy in front)
In the first scenario, there could be an nginx reverse proxy or apache2/httpd server with mod_proxy authenticating against a .htpasswd file, ldap and other authentication mechanisms supported by the servers.
Once authenticated, users and clients have read/write access unless there is a specific proxy configuration based on the URL or methods (GET/POST/PATCH/DELETE).
In the second case, there can still be a server/proxy in front but it wouldn’t manage the authentication. Users are managed in django and authentication is done against the database backend for each request, incurring a performance hit when validating access and permissions.
This method provides the possibility of a simple “read-only” access by setting
READ_LOGIN_REQUIRED: false and WRITE_LOGIN_REQUIRED: true.
#1: Authentication via a server/proxy
When authentication is handled by a server or proxy in front of the ara API
server, the following should be set in ~/.ara/server/settings.yaml:
default:
  # [...]
  EXTERNAL_AUTH: true
  READ_LOGIN_REQUIRED: false
  WRITE_LOGIN_REQUIRED: false
  # [...]
EXTERNAL_AUTH is used to accept authentication provided by the server in front of the API server.
READ_LOGIN_REQUIRED and WRITE_LOGIN_REQUIRED should both be false as they are only used when django is the one handling the authentication.
Once the ara API server has been restarted with the right settings, it is ready to accept requests from a server or proxy in front of it.
What follows are some example proxy configurations that have been contributed by users.
.htpasswd with nginx or apache2/httpd
Set up the right configuration in settings.yaml (see parent)
Install and start nginx or apache2/httpd
Create a .htpasswd file with an encrypted username/password, for example:
htpasswd -c -m /etc/httpd/.htpasswd usernameSet up a virtual host configuration in nginx or apache2/httpd
Ensure ara and proxy servers have been restarted with new configuration
Complete
For apache2/httpd, you can get started with the following configuration:
# /etc/httpd/conf.d/ara.conf
# or /etc/apache2/sites-{available|enabled}/ara.conf
<VirtualHost *:80>
    ServerName ara.example.org
    ProxyPass / http://127.0.0.1:8000/
    ProxyPassReverse / http://127.0.0.1:8000/

    <Location />
        Deny from all
        AuthUserFile /etc/httpd/.htpasswd
        AuthName "Privileged access"
        AuthType Basic
        Satisfy Any
        require valid-user
    </Location>
</VirtualHost>
For nginx, you can get started with the following configuration:
# /etc/nginx/conf.d/ara.conf
# or /etc/nginx/sites-{available|enabled}/ara.conf
upstream ara_api {
    # fail_timeout=0 means we always retry an upstream even if it failed
    # to return a good HTTP response
    server 127.0.0.1:8000 fail_timeout=0;
}

server {
    listen 80 default_server;
    server_name ara.example.org;
    auth_basic "Privileged access";
    auth_basic_user_file /etc/nginx/.htpasswd;

    # Everything, including static files, is served by the backend
    location ~ {
        # checks if the file exists, if not found proxy to app
        try_files $uri @proxy_to_app;
    }

    location @proxy_to_app {
        proxy_set_header X-Forwarded-For $proxy_add_x_forwarded_for;
        proxy_set_header X-Forwarded-Proto $scheme;
        proxy_set_header Host $http_host;

        proxy_redirect off;
        proxy_pass http://ara_api;
    }
}
ldap with apache2/httpd and mod_ldap
Set up the right configuration in settings.yaml (see parent)
Install and start apache2/httpd with mod_ldap
Set up a virtual host configuration for apache2/httpd
Ensure ara and proxy servers have been restarted with new configuration
Complete
You can get started with the following configuration:
# /etc/httpd/conf.d/ara.conf
# or /etc/apache2/sites-{available|enabled}/ara.conf
<VirtualHost *:80>
    ServerName ara.example.org
    ProxyPass / http://127.0.0.1:8000/
    ProxyPassReverse / http://127.0.0.1:8000/

    <Location />
        AuthName "Privileged access"
        AuthType Basic
        AuthBasicProvider ldap
        AuthLDAPURL "ldap://openldap/dc=example,dc=org?uid"
        AuthLDAPBindDN "cn=admin,dc=example,dc=org"
        AuthLDAPBindPassword "some_password"
        Require valid-user
        Allow from all
        Order allow,deny
    </Location>
</VirtualHost>
#2: Authentication via django
The API server can leverage Django’s built-in user management but doesn’t create any user by default.
Note
Creating users does not enable authentication on the API. In order to make authentication required for using the API, see Enabling authentication for read or write access.
In order to create users, you’ll need to create a superuser account before running the API server:
$ ara-manage createsuperuser --username=joe --email=joe@example.com
Password:
Password (again):
Superuser created successfully.
Tip
If you ever need to reset the password of a superuser account, this can be done with the “changepassword” command:
$ ara-manage changepassword joe
Changing password for user 'joe'
Password:
Password (again):
Password changed successfully for user 'joe'
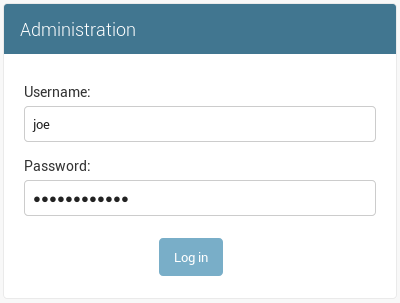
Once the superuser has been created, make sure the API server is started and then login to the Django web administrative interface using the credentials you just set up.
By default, you can start the API server with ara-manage runserver and
access the admin interface at http://127.0.0.1:8000/admin/.
Log in to the admin interface:
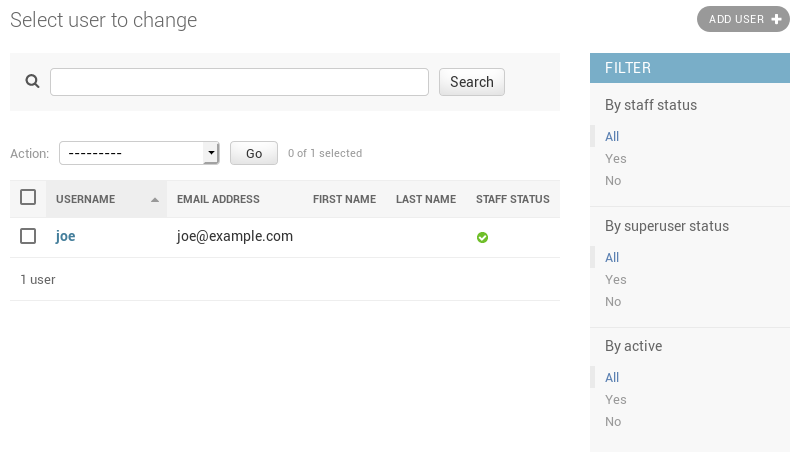
Access the authentication and authorization configuration:

And from here, you can manage existing users or create new ones:
Enabling authentication for read or write access
Once django users have been created, you can enable authentication against the API for read (ex: GET) and write (ex: DELETE, POST, PATCH) requests.
This is done with the two following configuration options:
ARA_READ_LOGIN_REQUIRED for read access
ARA_WRITE_LOGIN_REQUIRED for write access
These settings are global and are effective for all API endpoints.
Setting up authentication for the Ansible plugins
The callback plugin used to record playbooks as well as the ara_record
action plugin will need to authenticate against the API if authentication is
enabled and required.
You can specify the necessary credentials through the ARA_API_USERNAME and
ARA_API_PASSWORD environment variables or through your ansible.cfg file:
[defaults]
# ...

[ara]
api_client = http
api_server = http://api.example.org
api_username = ara
api_password = password
Using authentication with the API clients
To instanciate an authenticated client with the built-in basic HTTP authentication provided by Django:
from ara.clients.utils import get_client
client = get_client(
    client="http",
    endpoint="http://api.example.org",
    username="ara",
    password="password"
)
If you have a custom authentication that is supported by the
python requests
library, you can also pass the relevant auth object directly to the client:
from ara.clients.http import AraHttpClient
from requests_oauthlib import OAuth1
auth = OAuth1(
    "YOUR_APP_KEY",
    "YOUR_APP_SECRET",
    "USER_OAUTH_TOKEN",
    "USER_OAUTH_TOKEN_SECRET"
)
client = AraHttpClient(endpoint="http://api.example.org", auth=auth)
Managing hosts allowed to serve the API
By default, ARA_ALLOWED_HOSTS authorizes
localhost, ::1 and 127.0.0.1 to serve requests for the API server.
In order to host an instance of the API server on another domain the domain must be part of this list or the application server will deny any requests sent to it.
Managing CORS (cross-origin resource sharing)
The ARA_CORS_ORIGIN_WHITELIST default was designed to allow a local development instance of an ara-web dashboard to communicate with a local development instance of the API server.
The whitelist must contain the domain names where you plan on hosting instances of ara-web.
ara-web has since been archived but this could prove useful for other use cases.